GPath Laser
Fill
Last updated Jul 26, 2026, 11:41 AM
1. Create a Fill operation
There are multiple ways to create a fill operation:
- Open the Laser operations tab in the right sidebar and click Fill operation
- Right-click selected shapes on the canvas and choose New fill toolpath from selection…
- Right click a vector name in the Design tab and choose New fill toolpath from selection….
- Top menu > Laser operations > Fill
Select closed shapes that define the area to engrave or clear. Set hatch spacing and angle, power and speed, then save.
Fill lays down parallel hatch lines inside the outline. Use Line when you only need to cut or score the path itself.
QR codes must use Fill so modules engrave solid and scan reliably.
2. What Fill does
A Fill operation rasterises the interior of closed shapes — the laser scans back and forth (or at an angle) to shade or engrave the region.
| Use | Notes |
|---|---|
| Area engrave | Solid logos, filled text, badges, and shaded panels |
| Light mark | Lower power / faster speed for surface marking without deep burn |
Open paths do not fill — close them with Join or draw a closed shape first. For photos, an Image operation is automatically generated from Import instead.
3. Line spacing and angle
| Setting | Purpose |
|---|---|
| Line spacing | Distance between scan lines (project units). Smaller spacing = denser fill and more burn time |
| Angle (degrees) | Direction of the scan lines |
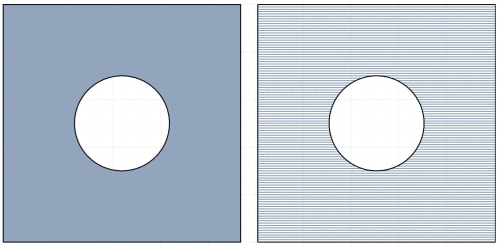
| Subtract nested shapes | Treat nested outlines as holes and islands — depth 1 nests are subtracted, depth 2 filled again, and so on. Important: For a nested shape to be subtracted, it must be selected/applied to the same fill operation as the parent shape |
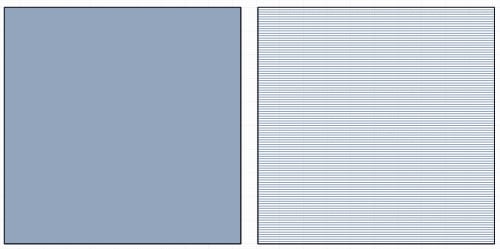
The above shows line spacing at 0.2mm (left), and 1mm spacing (right).
Turn on Subtract nested shapes for frames, letter counters, and shapes with holes so the fill stays on the solid regions only:
4. Power and speed
| Setting | Purpose |
|---|---|
| Max Power (%) | Beam power as a percentage of the machine maximum (max S value) |
| Dynamic Power (M4) | When on, power scales with feed for more even burns at direction changes. When off, constant power (M3) |
| Cut speed | Feed rate (travel speed) while the beam is on |
5. Cut settings
| Setting | Purpose |
|---|---|
| Passes | How many times to repeat the fill lines — useful for deeper engraving or stubborn material |
| Kerf compensation | Offset for beam thickness; use 0 for no offset |
| Air Assist | Turns air assist on in the generated G-code when your post-processor supports it, can result in a cleaner engrave |
6. Applying to shapes/vectors
With the Fill menu panel open, click shapes on the canvas to include them in the operation. Current selection is highlighted.
Toggle operation visibility in the Laser operations list to include or exclude an operation from Run, Frame, and export.
7. Preview
Fill previews as power-shaded lines. both on the canvas, and also in the simulator. Darker shades = higher power setting applied.
Load the operation in the Laser Simulator to check coverage and power before running.