GPath Laser
Line
Last updated Jul 26, 2026, 11:41 AM
1. Create a Line operation
There are multiple ways to create a line operation:
- Open the Laser operations tab in the right sidebar and click Line operation
- Right-click selected shapes on the canvas and choose New line toolpath from selection…
- Right click a vector name in the Design tab and choose New line toolpath from selection….
- Top menu > Laser operations > Line
The operation panel opens. Add the shapes to cut, set power and speed, then save.
Line follows the vector outline — for through-cuts, scoring, and edge engraving. Use Fill when you need a hatched area instead.
2. What Line does
A Line operation follows the drawn path — the laser fires along open or closed outlines.
| Use | Typical settings |
|---|---|
| Cut through | Higher power, slower speed, multiple passes until the sheet separates |
| Score / mark | Lower power, faster speed, often a single pass |
Vector imports can create a Line operation automatically — see Import.
3. Power and speed
| Setting | Purpose |
|---|---|
| Max Power (%) | Beam power for the cut, as a percentage of the machine maximum |
| Dynamic Power (M4) | When on, power scales with feed so corners and acceleration burn more evenly. When off, constant power (M3) |
| Cut speed | Feed rate while the beam is on |
Dynamic power is recommended for most vector cuts. Constant power can leave heavier marks at corners where the machine slows down, and start/stop positions.
Confirm max S on your machine profile matches firmware (255, 1000, or 10000) so power % maps correctly in G-code output.
4. Cut settings
| Setting | Purpose |
|---|---|
| Passes | How many times to repeat the cut path — useful for thick or hard material |
| Kerf compensation | Offset for beam thickness, use 0 for no offset |
| Air Assist | Turns air assist on in the generated G-code when your post-processor supports it, often resulting in cleaner cuts |
5. Bridges / tabs
Tabs (often referred to as bridges) leave short uncut bridges along a through-cut so the part stays attached to the sheet until you snap or cut them free. That reduces the chance of a loose piece shifting mid-job.
See the dedicated guide for size, power, auto spacing, and canvas placement:
Tabs are available on Line operations only — not Fill or Image.
6. Applying to shapes/vectors
With the Line panel open, click shapes on the canvas to include them in the operation. Highlights show the current selection.
- Closed and open paths both work for Line.
- Toggle operation visibility in the Laser operations list to include or exclude an operation from Run, Frame, and export.
7. Preview and run
Canvas and Laser Simulator previews shade cut strokes by power so lighter and heavier burns are easy to compare. Load the operation in the simulator before you send the job to the machine.
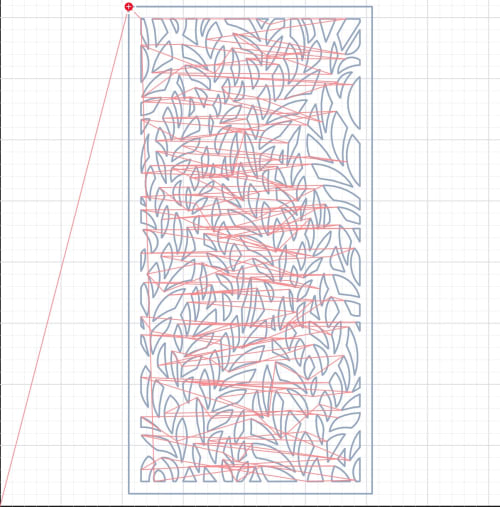
The above simulation shows a light preview for cut operations, as the power is set to 20%. Travel with beam off is shown in red (optional).