GPath Laser
Overscan
Last updated Oct 14, 2026, 6:31 PM
1. Why use overscan?
Fill operations and raster image engraving moves the laser head back and forth along each scan line. At the start of a burn the machine is still accelerating, so the first millimetres can run slower than the set Cut speed and burn darker (or lighter) than the rest of the line.
Overscan extends each scan with a short laser-off approach and exit. The head reaches full feed outside the engraved area, then turns the beam on only for the real burn. The same exit ramp decelerates after the burn ends.
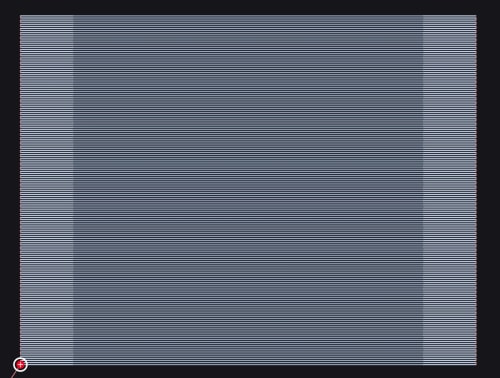
The above image is taken from the laser simulator view. The lighter gray lines on the left and right sides demonstrate the laser head extending (power off) beyond the filled square.
Note: the canvas does not show overscanning, switch to the laser simulator view.
Overscan can apply to:
It does not apply to Line cuts. Off by default so existing jobs stay unchanged.
2. Enable overscan
Open a Fill or Image operation panel. In the hatch / image settings group:
| Control | Purpose |
|---|---|
| Overscan | Toggle oevrscan on/off |
| % | Overscan distance as a percent of cut speed (see below) |
| ≈ … each end | Resolved length in project units, shown beside the % field |
Default when you turn the toggle on is 2.5%. Range is 0–25%.
Save the operation to keep the setting. Overscan is per operation — turning it on for one Fill does not change another Image or Fill in the same project.
3. How distance is calculated
Distance is a percent of cut speed expressed as units per second:
| Example | Result |
|---|---|
| 2.5% at 6000 mm/min | 6000 ÷ 60 = 100 mm/s → 2.5 mm approach and 2.5 mm exit |
| 2.5% at 3000 mm/min | 1.25 mm each end |
Faster cut speeds produce longer overscan for the same percent, which matches the longer distance needed to accelerate. The panel always shows the length for the current cut speed so you can judge clearance around the design.