GPath CNC
Bridges / Tabs
Last updated Jul 26, 2026, 11:41 AM
1. Why use tabs?
A full-depth profile cut can free the part from the stock before the job finishes. Vibration, a loose workpiece, or a tool catching a detached edge can ruin the cut or crash the machine.
Bridges / tabs leave short raised strips of material along the profile so the part stays attached until you snap or cut them free after machining. Tabs apply to profile toolpaths only (Inside, Outside, On-line) — not pockets or drill.
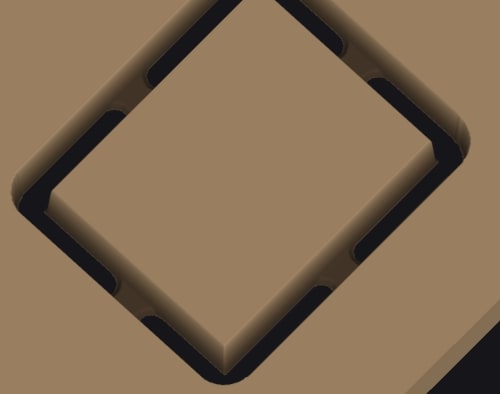
Above shows the CNC simulator view, the tool lifts to leave a short section of material in place, ensuring the part remains in place.
2. Enable tabs
Open a profile toolpath and find the Bridges / Tabs group in the toolpath panel.
| Control | Purpose |
|---|---|
| Enable tabs | Turn bridge generation on for this toolpath |
| Auto / Manual | Place tabs evenly around each shape (auto), or click them on the canvas(manual) |
| Regular / 3D | Regular = raised flat bridge, 3D = 'triangle' that ramps up to tab height at the centre |
| Tab length | Length of bridge/material to remain (project units) |
| Tab thickness | Material left above finish depth at each tab (bridge height) |
The panel diagram updates for Regular vs 3D so you can see the side-view shape of the bridge.
3. Tab length and thickness
Tab length is the length of the bridge, not the distance the tool centre travels. GPath CNC extends the cut-path span by the tool diameter so a 5 mm tab with a 5 mm tool still leaves about 5 mm of material — not zero.
Tab thickness is how much material remains above finish depth at the bridge. Thicker tabs hold better but take more cleanup, thinner tabs break more easily but may not secure a large part.
Choose length and thickness for your material, part size, and how you will free the finished piece.
4. Regular vs 3D
| Style | Behaviour | Side view |
|---|---|---|
| Regular | Tool lifts to a flat Z height over the tab length, then resumes full depth |  |
| 3D | Tool ramps from full depth at the tab edges up to tab height at the centre, then back down — a wedge of material |  |
Use Regular when you want a simple flat bridge. Use 3D when a gradual Z change is easier on the tool or leaves a cleaner bridge profile.
5. Auto placement
In Auto mode, GPath distributes tabs around each selected shape:
| Mode | Behaviour |
|---|---|
| Tabs per shape | Fixed count of tabs on every shape |
| Equal spacing | Tabs every Tab spacing distance along the perimeter; optional Max tabs per shape caps the count |
Tab offset rotates all auto-placed tabs around the profile. Centre on the slider is halfway around; full right returns tabs to the start position. Use offset to move bridges off corners, leads, or visible edges.
Layout is per shape on multi-shape toolpaths — each outline gets its own count, spacing, and offset along its own perimeter.
6. Manual placement
Switch to Manual, turn on Enable canvas selection, then click the toolpath on the 2D Drawing canvas to add a tab. Markers and length highlights follow the cut path (including corners and arcs).
Disable canvas selection when finsihed if needing to add/remove vectors to the toolpath operation by clicking. Or, to lock-in current bridges.
| Tip | Detail |
|---|---|
| Placement | Tabs sit where you click — Tab offset does not apply in manual mode |
| Leads | Clicks on lead-in or lead-out moves are ignored, tabs belong on the cut loop only |
| Count | The panel shows how many tabs are placed |
| Clear | Clear all tabs removes every manual placement |
Note- updating the start position in the simulator can adjust bradges to avoid collisions if falling on the same section.
7. Skip nested shapes
Turn on Skip nested shapes when you do not want tabs on shapes that sit inside another selected outline (for example, an inner hole while the outer contour gets bridges). Nested shapes still cut, they simply do not receive tabs.
8. Preview and export
Canvas markers and length highlights update while you edit. Saved and exported G-code includes the same tab lifts as the in-app preview.
Load the toolpath in the Toolpath Simulator or Material Removal view to confirm bridges look correct before you cut.
9. Tips
- Put tabs on straight edges away from fragile corners when possible, use Tab offset in auto mode to rotate them into place.
- Avoid stacking a tab on a bad start position unless you want the entry to lift — GPath handles start tabs, but placement still affects finish and hold.
- On large or thin parts, prefer more tabs or thicker bridges. On small parts, fewer short tabs are easier to clean up.
- If tabs seem missing on an inner shape, check Skip nested shapes selection.
- If manual clicks do nothing, confirm Enable tabs and Manual are on, canvas selection is enabled, and you are clicking the cut path (not a lead).