GPath CNC
Last updated Jul 26, 2026, 11:41 AM
1. Create a pocket toolpath
Open the Toolpaths tab and click New Pocket/Area Clearance Toolpath, or right-click selected shapes and choose New pocket toolpath from selection….
Select one or more closed shapes that define the area to clear. Assign a tool, set depths, choose a clearing strategy, and save the toolpath.
2. Clearing strategy
Pocket toolpaths are used to clear an area of material.
| Strategy | Behaviour |
|---|---|
| Zigzag (Raster) | Parallel back-and-forth passes fill the pocket, always finishes with a boundary pass when a finishing allowance is set |
| Offset (Spiral) | Offset loops spiral from the centre to the outer boundary |
The panel shows a diagram of the active strategy.
3. Nested shapes
Enable Subtract nested shapes when shapes sit inside one another. The pocket toolpath avoids the inner shape:
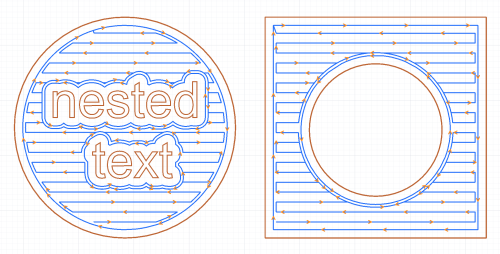
GPath CNC treats the outer shape as the pocket boundary and alternates which nested levels are cut away or left solid by depth.
For raised (relief) lettering — pocket the background around nested text — see Raised text.
4. Finishing pass
A finishing pass cleans the pocket boundary after clearing. The finishing pass value sets how much material to leave on the boundary, this is then removed as a final finishing pass at full depth:
- Zigzag — set a Finishing pass allowance (stock left on the wall before the final contour). The allowance is capped by the tool step-over.
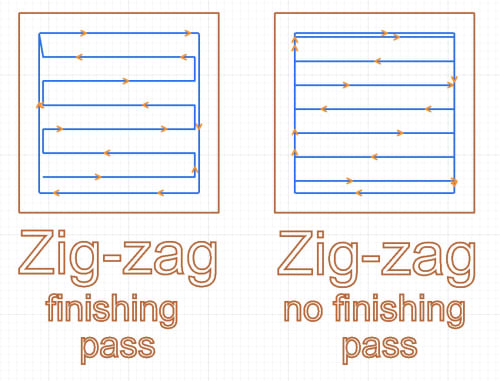
- Offset (Spiral) — toggle Finishing pass on boundary and set the allowance when you want a final trace around the edge.
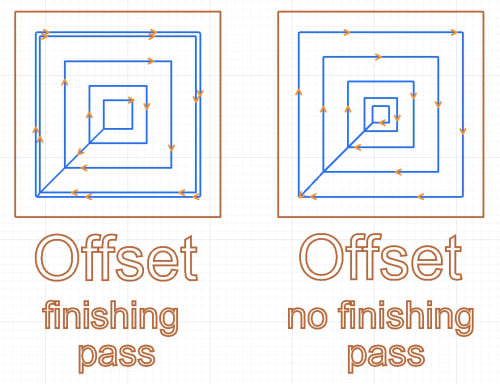
Text-only pocket selections skip finishing controls in the panel.
5. Depth and entry
Set Start Depth and Finish Depth as for profiles. Multiple passes use the tool step-down.
Entry Ramping offers two choices for each depth pass:
| Mode | Behaviour |
|---|---|
| Vertical Plunge | Tool drops straight to depth at the pocket entry |
| Ramp | Tool descends while moving along the pocket path, spreading the plunge over XY travel |
See Entry ramping for more information about ramping.
6. Milling direction
Pocket clearing always mills as an inside cut. The panel shows the effective climb/conventional direction for reference.
Start-point selection does not apply to pockets — entry follows the generated clearing path.