GPath CNC
Entry Ramping
Last updated Jul 26, 2026, 11:41 AM
1. Why ramp?
A vertical plunge drives the full step-down force through the tool tip in one move. That can:
- overload small or long cutters,
- pack chips in deep slots,
- mark the entry point on the finished surface, and
- wear the tool centre where cutting edges are weakest.
Entry ramping spreads the descent over XY travel so the tool engages gradually along a cut path instead of dropping straight in. Ramping is especially important on profile and pocket first passes, and on every depth pass when step-down splits the job into multiple Z levels.
2. Where ramping applies
| Toolpath | Options in the panel |
|---|---|
| Profile | Vertical Plunge, Smooth, Zig Zag, Spiral — plus optional Leads on a separate tab |
| Vertical Plunge or Ramp (path-following ramp each pass) | |
| Drill | Not used — drilling uses plunge or peck cycles |
Open Entry Ramping in the toolpath panel (under Leads on profile toolpaths).
3. Profile ramp types
| Type | What it does | Good for |
|---|---|---|
| Vertical Plunge | Straight G1 down at plunge rate | Shallow passes, strong tools, soft material 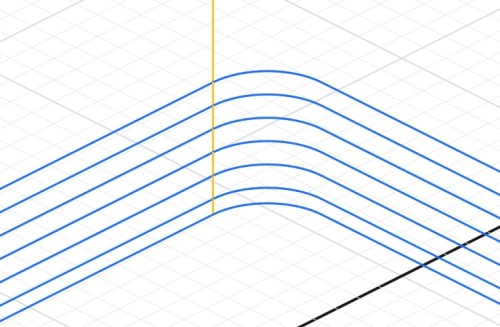 |
| Smooth | Gradually descends along the first part of the cut path, then completes the loop at depth. With a full depth final pass | Closed profiles where you want a gradual entry along the actual contour 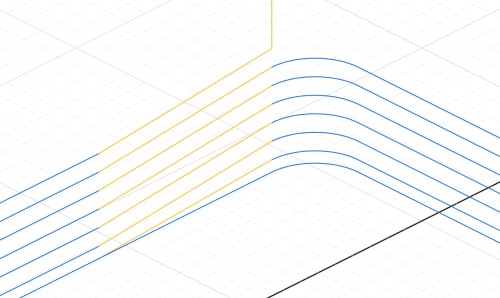 |
| Zig Zag | Moves forward along the path to half depth, returns to the start at full depth, then cuts the profile | General-purpose entry; works with lead-in when leads are enabled 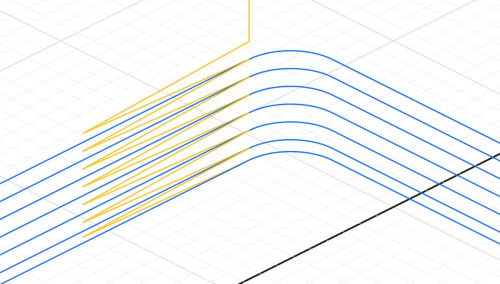 |
| Spiral | Spreads each step-down over a full loop around the contour, then a final flat pass | Deep multi-pass profiles; ramp distance is ignored because descent covers the whole perimeter 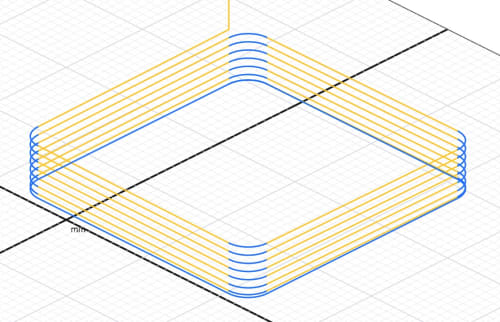 |
4. Ramp distance
For Smooth and Zig Zag, Ramp Distance is the XY travel used while descending. When left at zero, GPath defaults to 10 mm (or the inch equivalent in imperial projects).
Spiral ramping always uses the full loop length, so ramp distance is disabled.
On closed profiles, ramp travel follows the actual cut geometry — the tool stays on the contour instead of cutting a synthetic ramp outside the shape.
5. Multi-pass depth
When finish depth requires several step-down passes, ramping runs at the start of each pass. Smooth and Zig Zag ramp from the previous pass depth to the next. Spiral descends one step-down per full loop per pass.
6. Ramping with leads
On profile toolpaths, Leads and Entry Ramping are separate tabs but can combine, use Vertical Plunge or Zig Zag with leads.
See Leads for approach geometry and inside/outside placement.
7. Ramping with bridges / tabs
When bridges / tabs would land on the entry ramp from the start position, GPath CNC shifts them to just before the loop start so the bridge is not cut through while ramping in.
8. Pocket ramping
Pocket toolpaths offer a simpler choice:
| Mode | Behaviour |
|---|---|
| Vertical Plunge | Drop to depth at the pocket entry point |
| Ramp | Descend while following the generated clearing path |
Use ramp on pockets when a straight plunge would stress the tool or leave a mark at the entry. Set Ramp Distance the same way as for profiles (default 10 mm when zero).